Neurography: how I create…
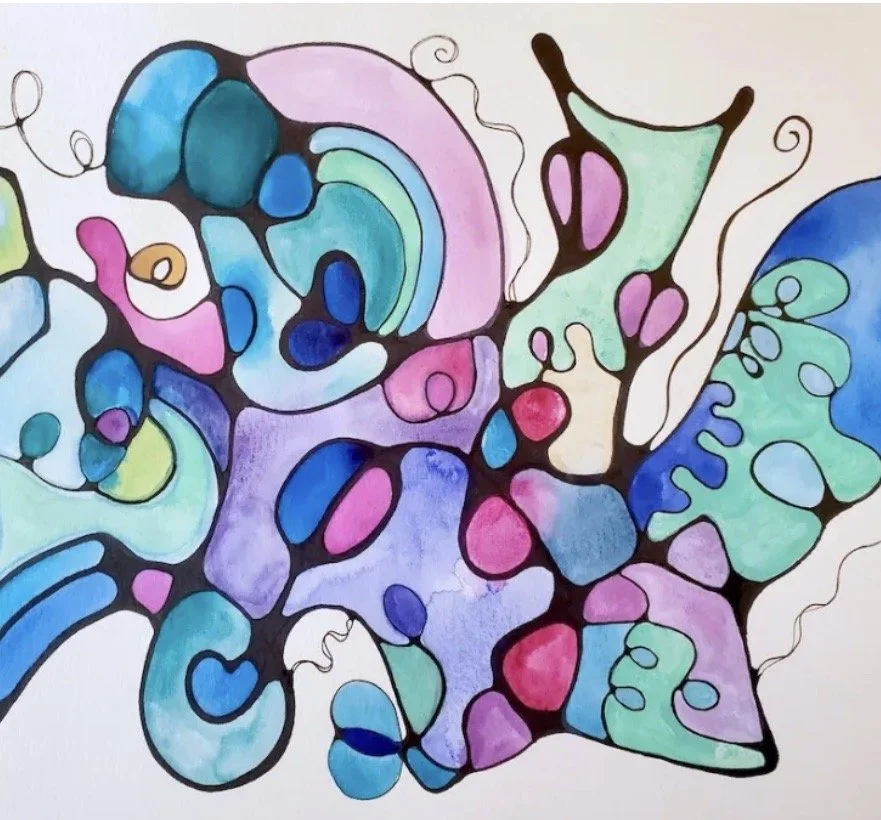
Here are the steps I took to make a neurotrophic drawing. You can use this image to inspire your own sketch or create a drawing that comes to mind when reflecting upon a word that comes to mind when reflecting on your journaling. Do this simple sketch in your journal or take it further and do a little painting on watercolor paper. You can add color to the spaces created between the “neurons”.
Step One:
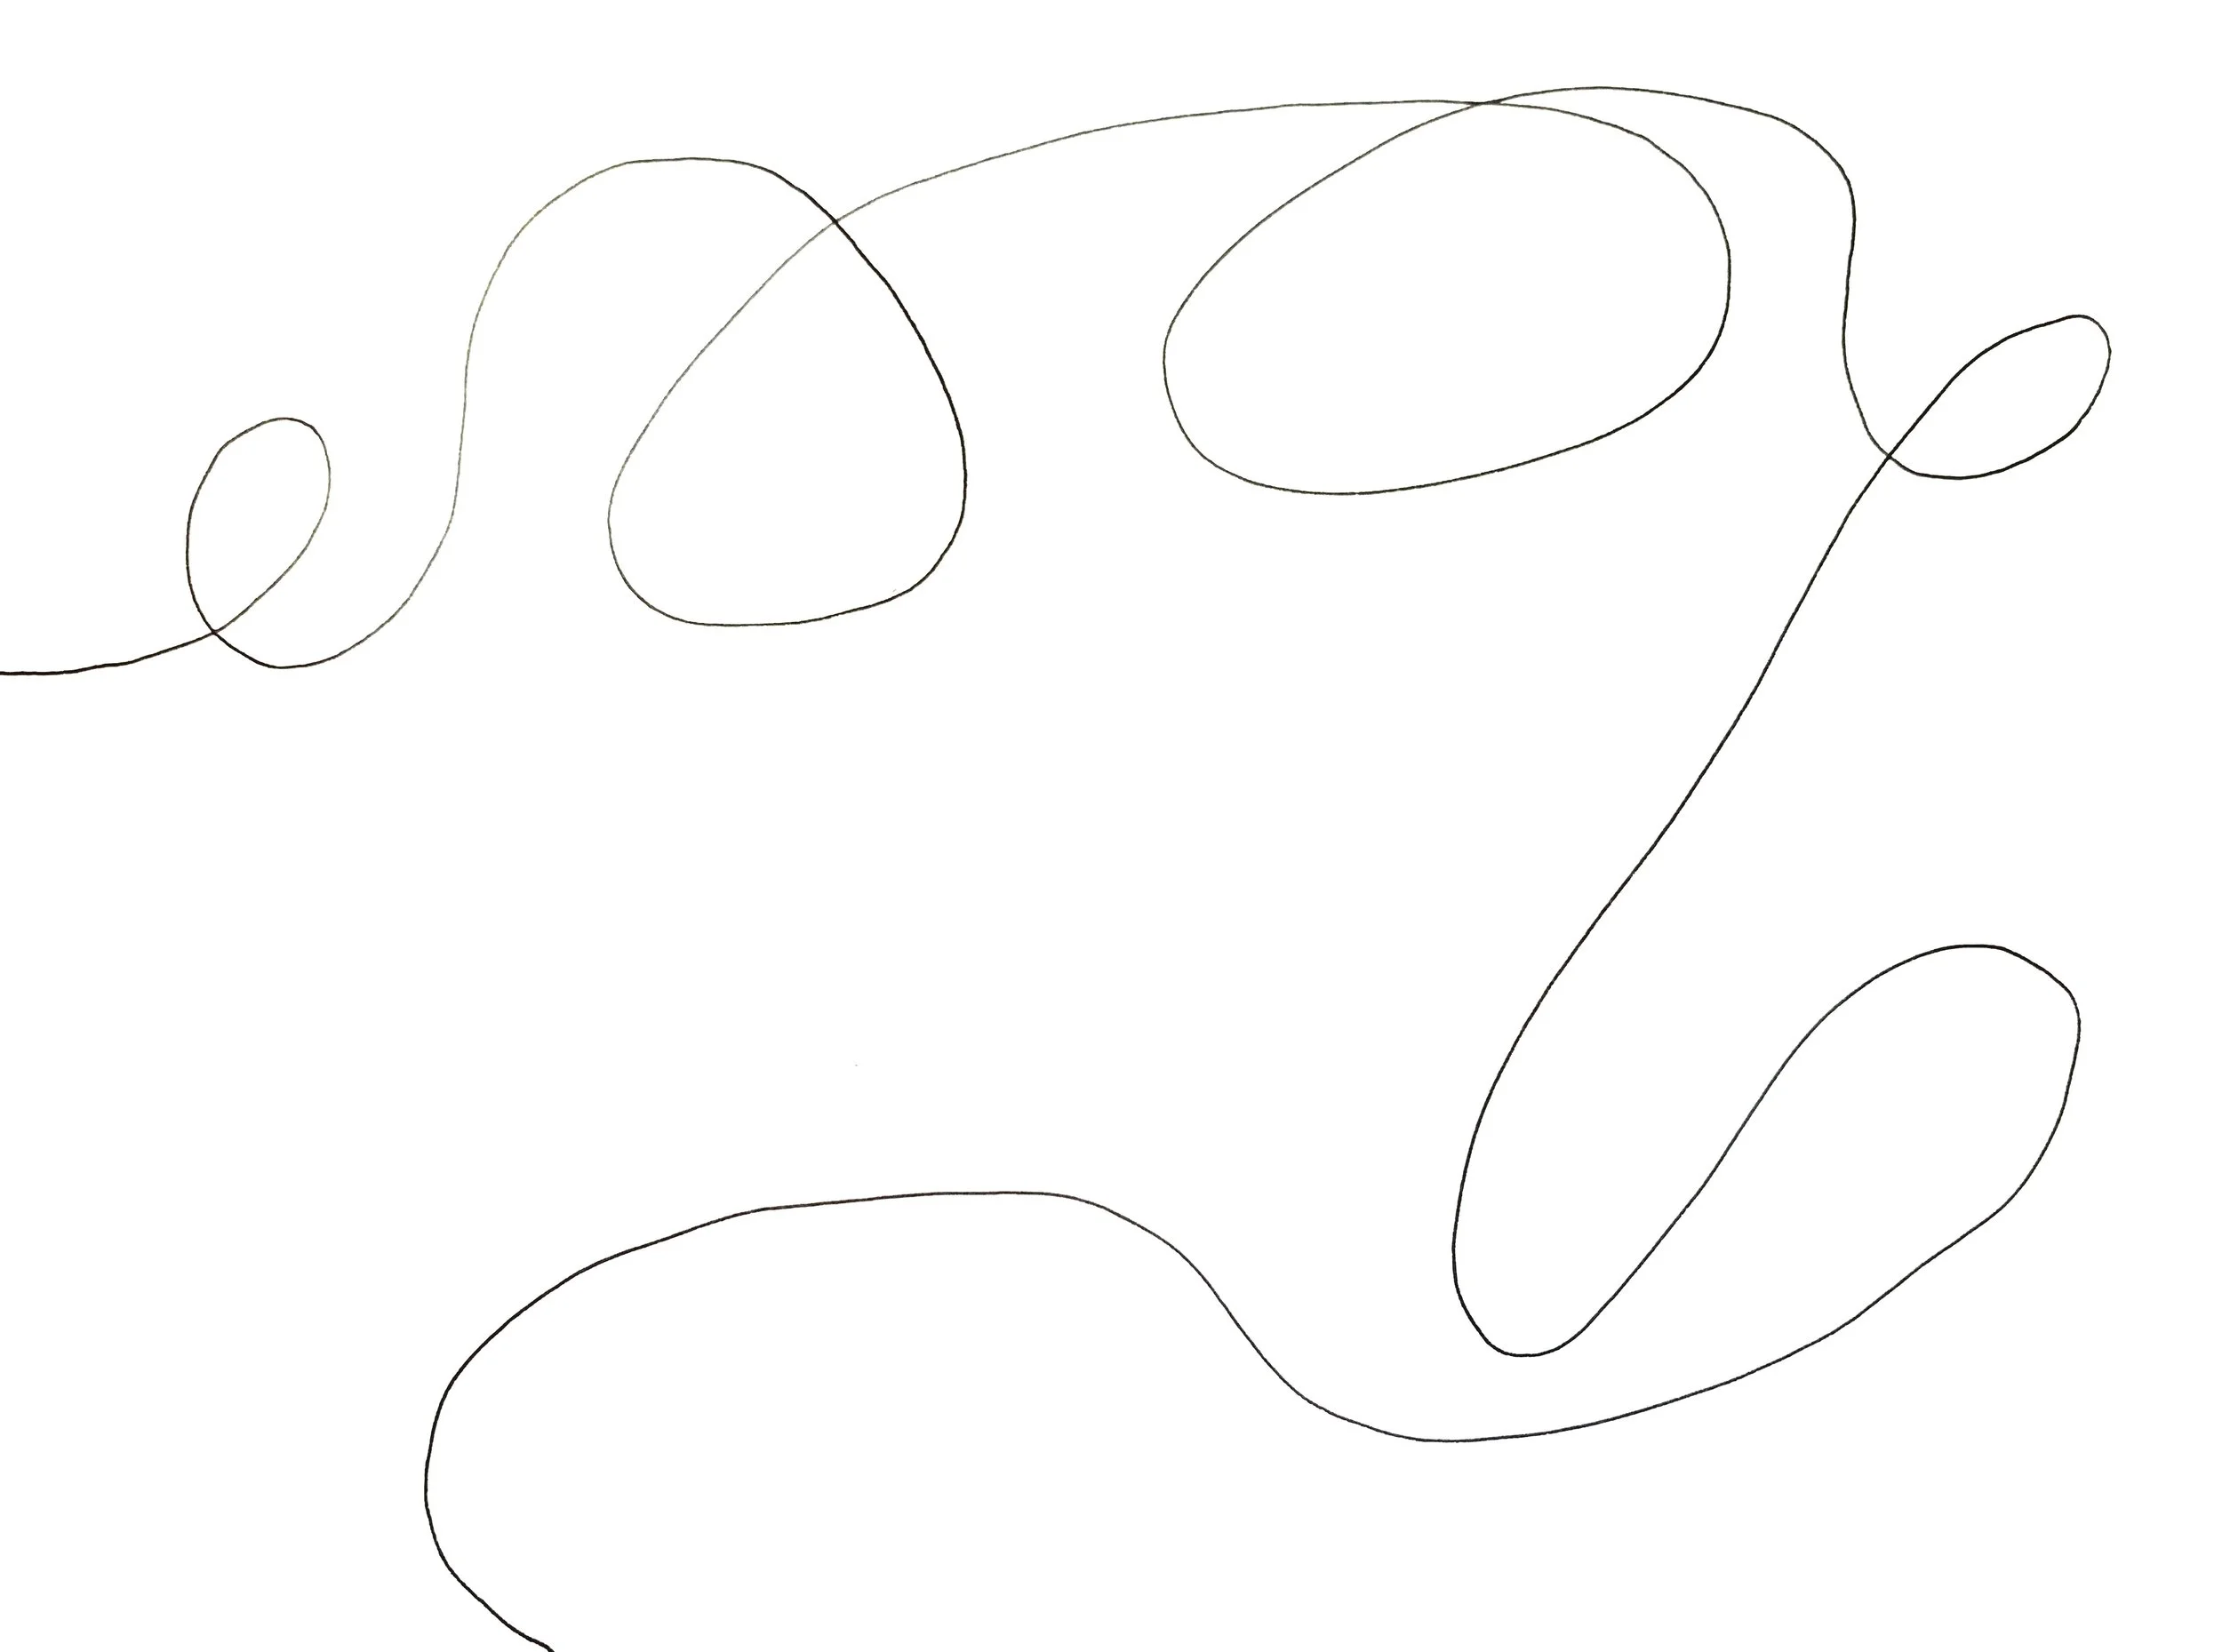
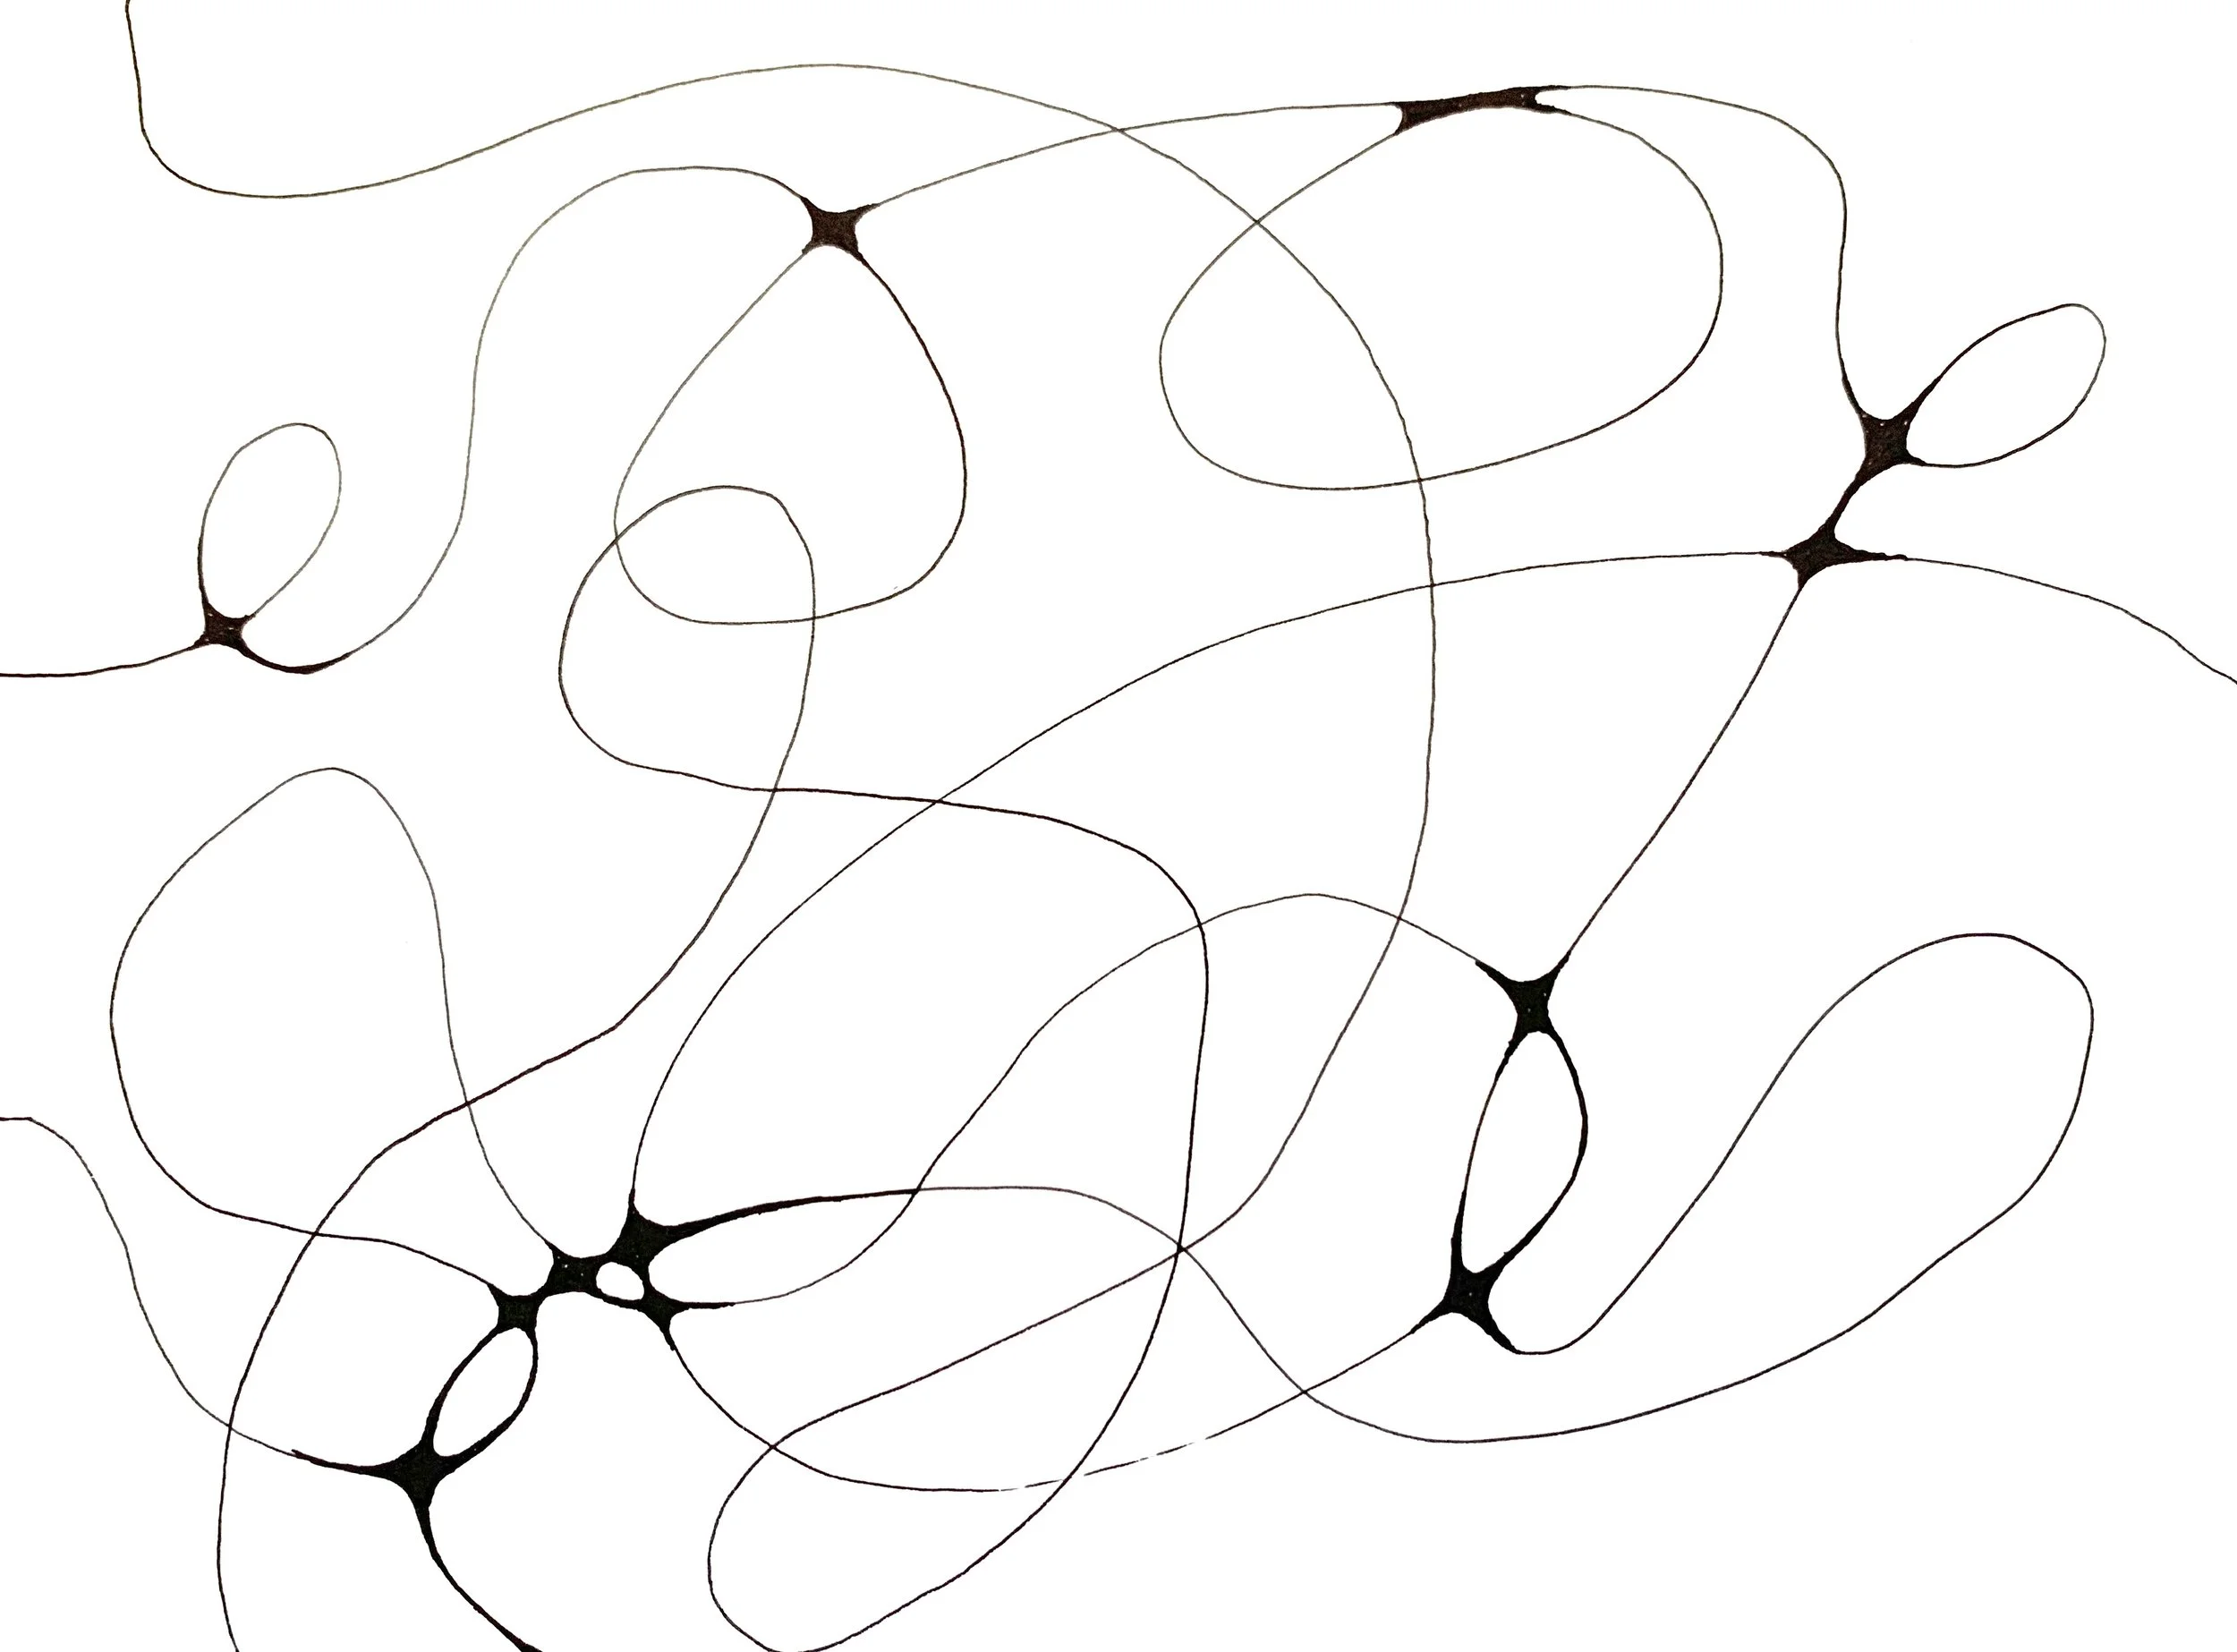
Think of a word, perhaps something that came to mind when you were journaling from the prompts in the What or the Who section. Examples are Confused, Grief, Happy… I thought of the word Joy and wrote it on the back of a small piece of paper. Start from the edge of the paper and let the pen wander across the paper until it goes off somewhere else. It was really wild, but I noticed that my line spelled an abstract version of Love upside down!! Promise I didn’t do that intentionally!!
Step Two:
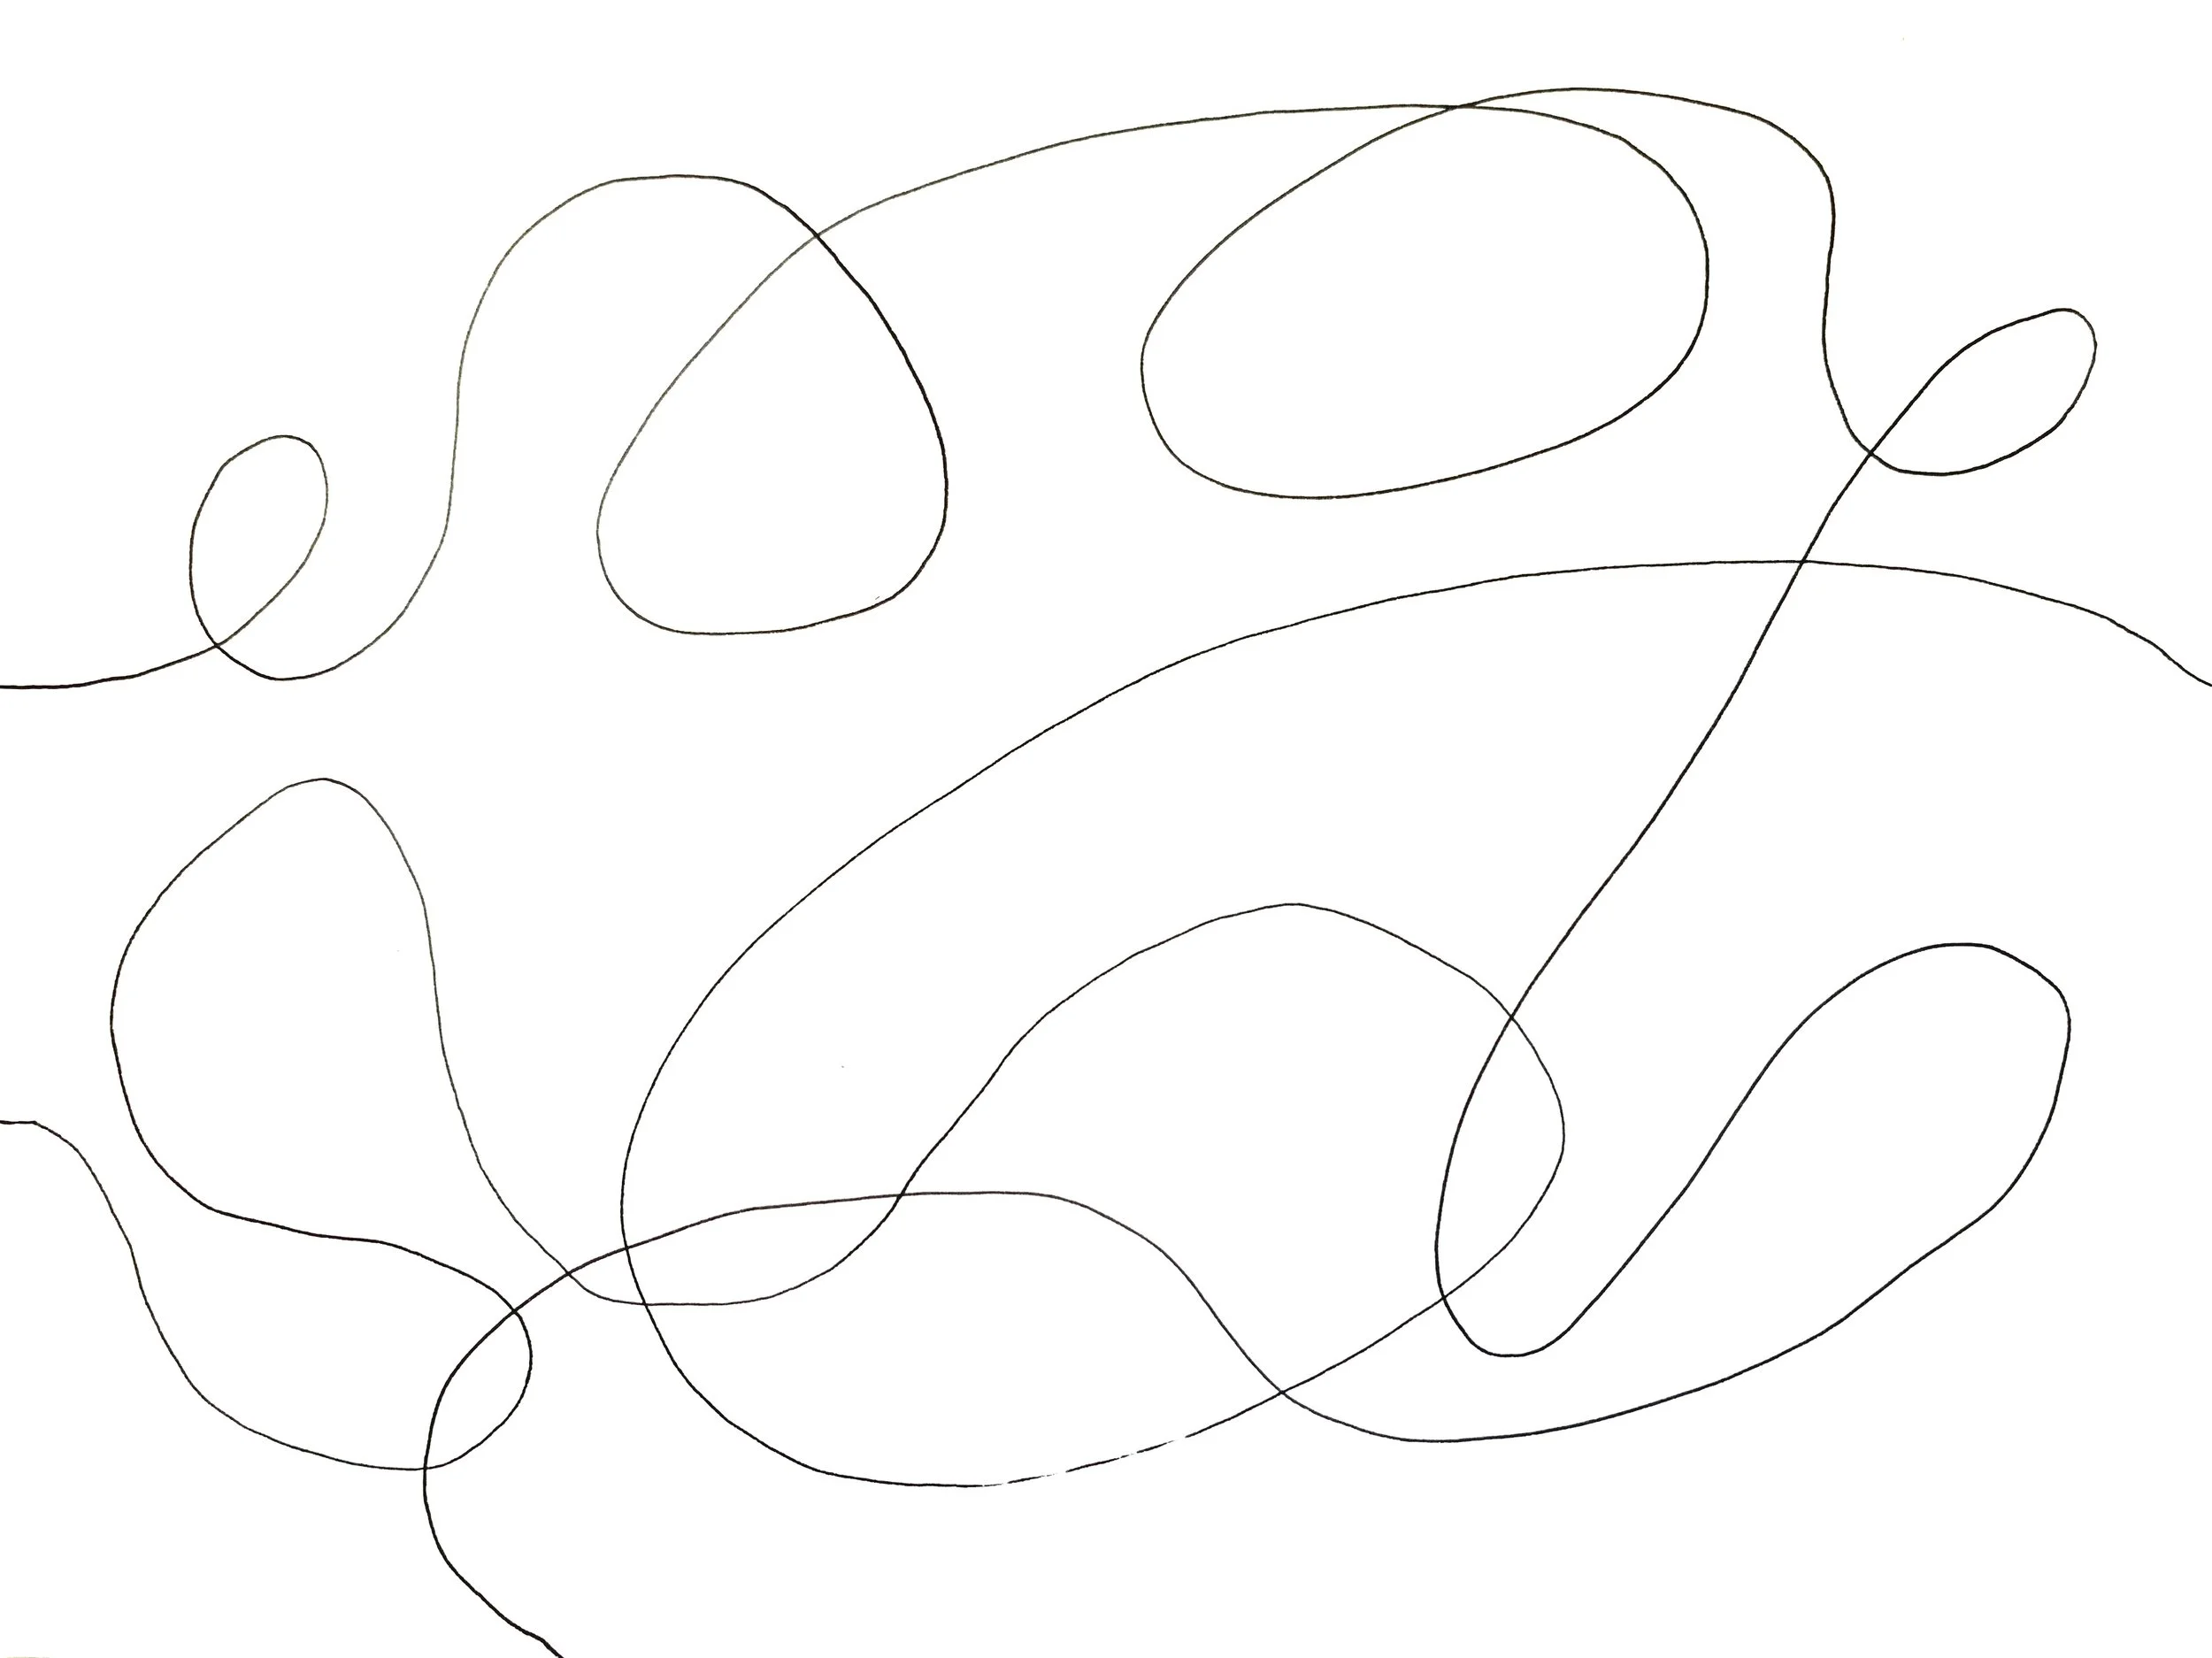
Add another line or two following the same steps as above. Keep your mind on the intentional word you wrote on the back of your paper. Let the lines cross as many times as you like.
Step Three:
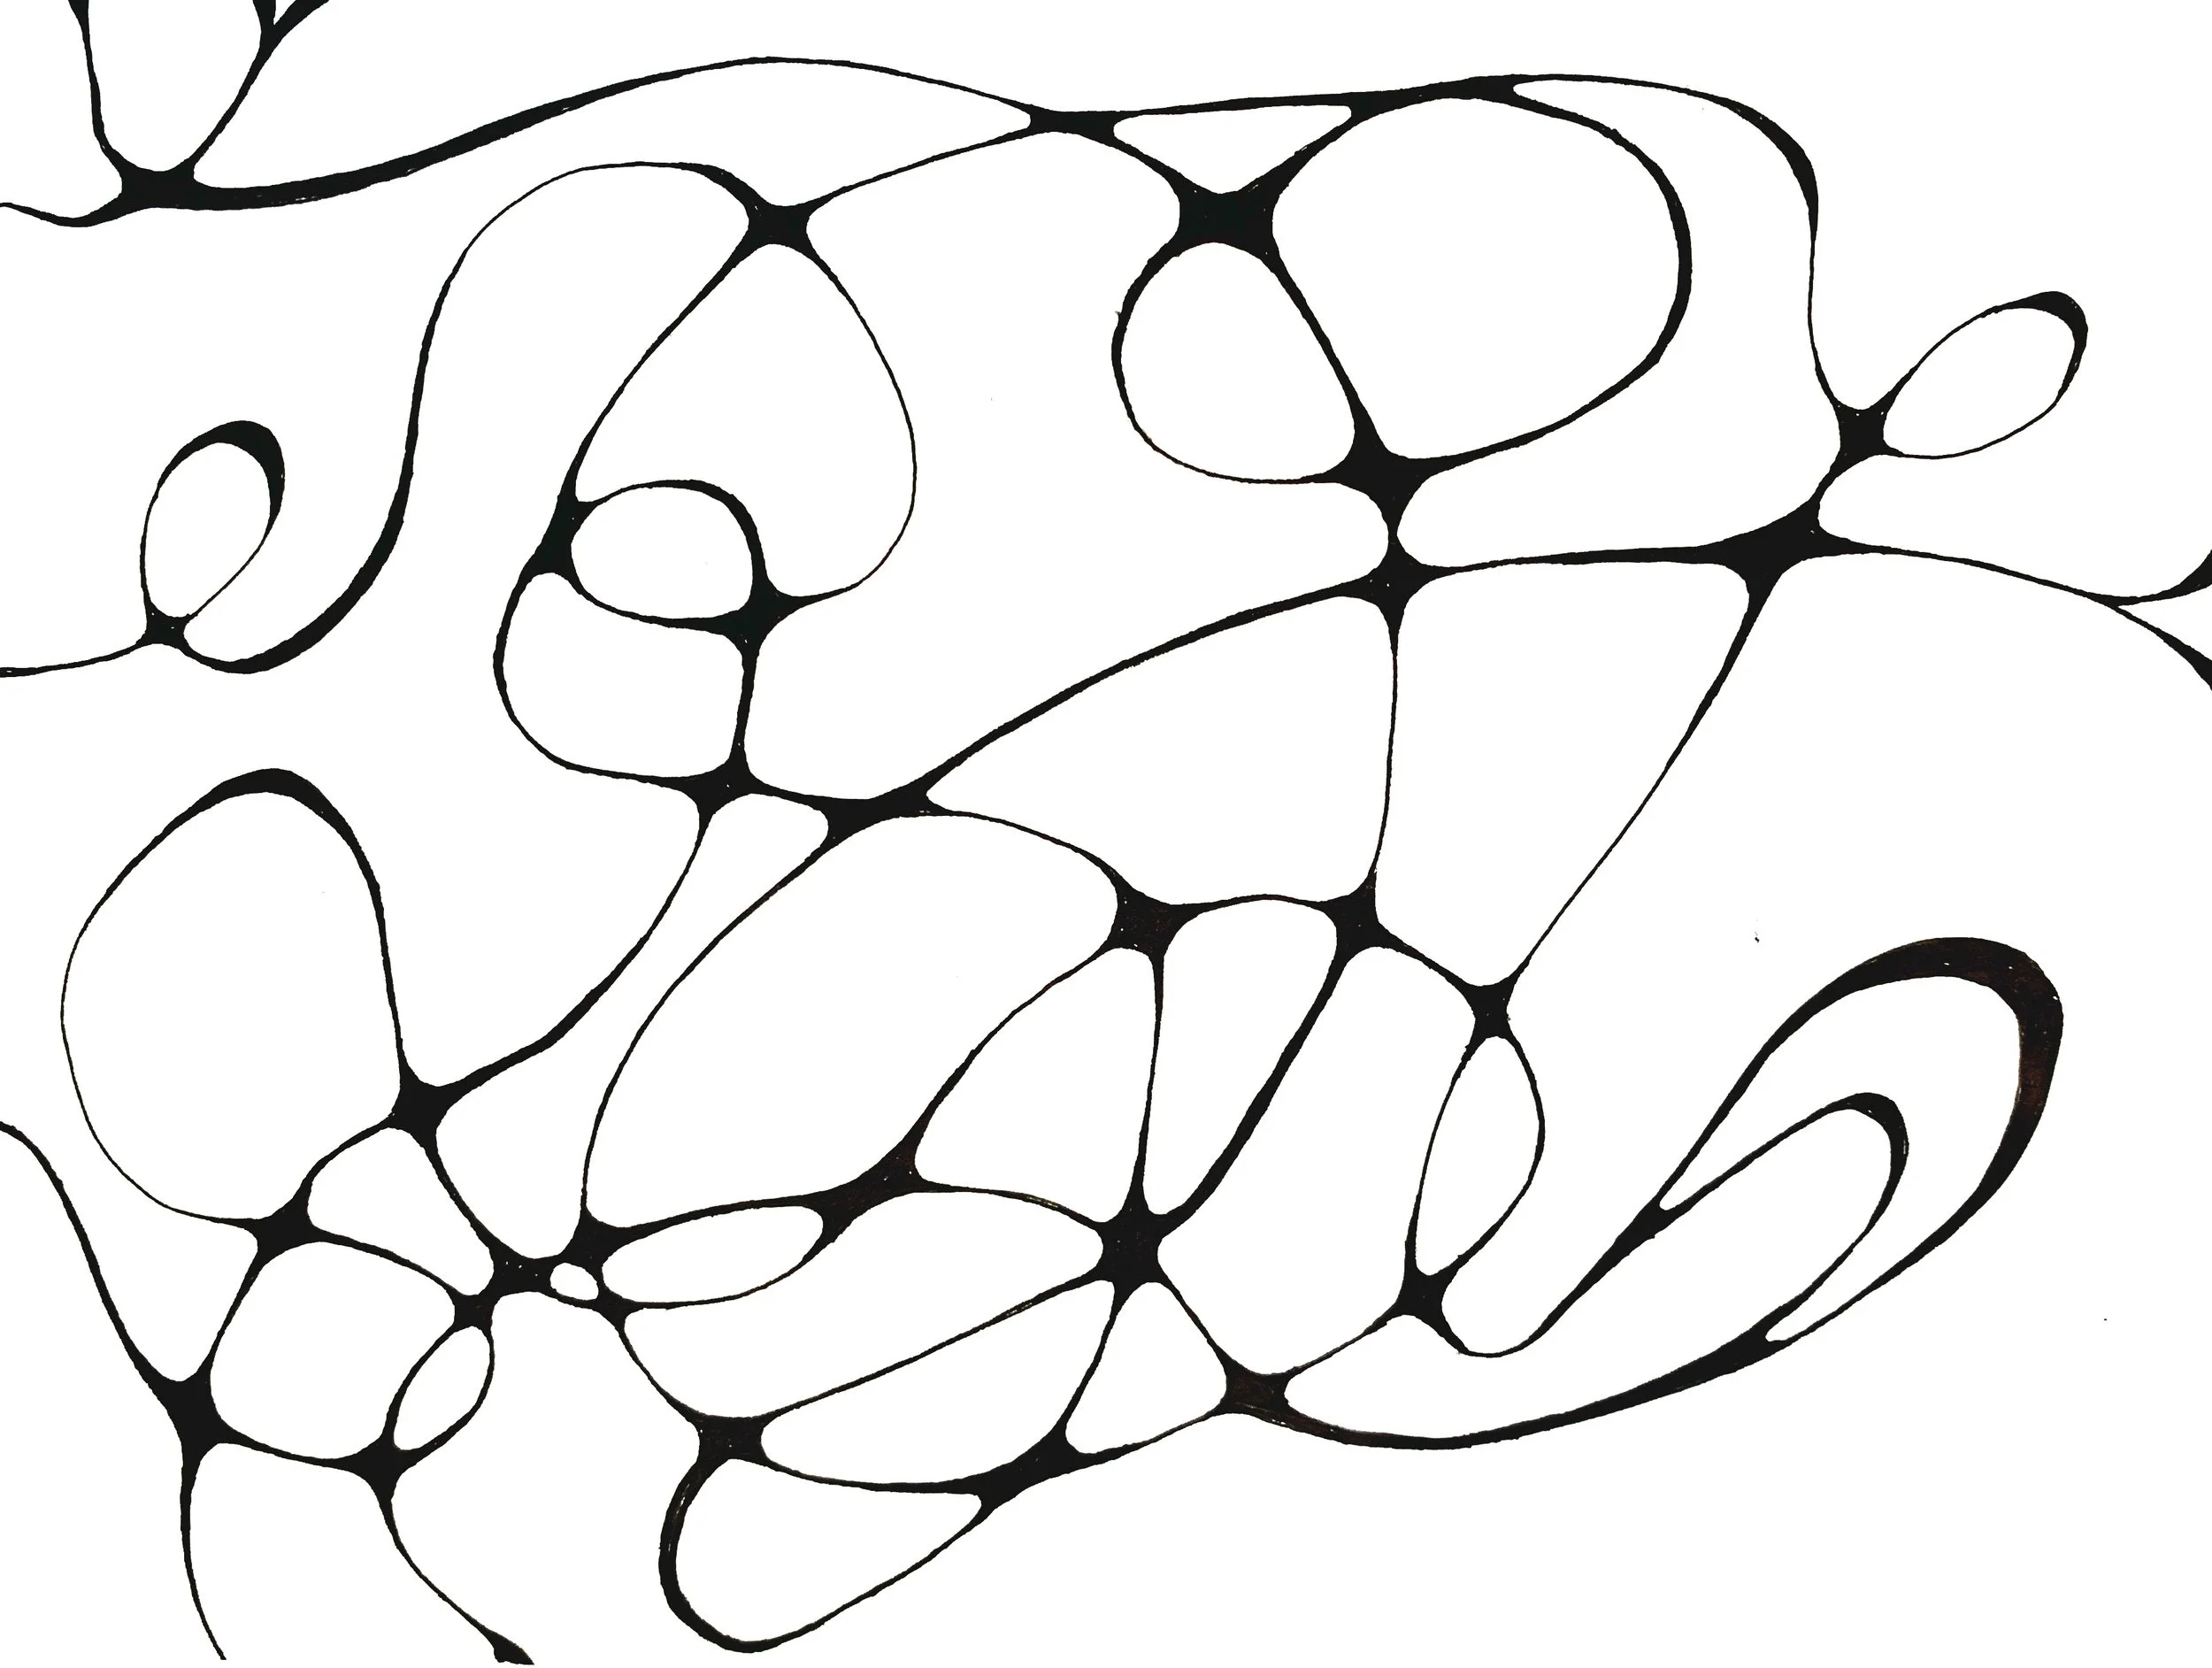
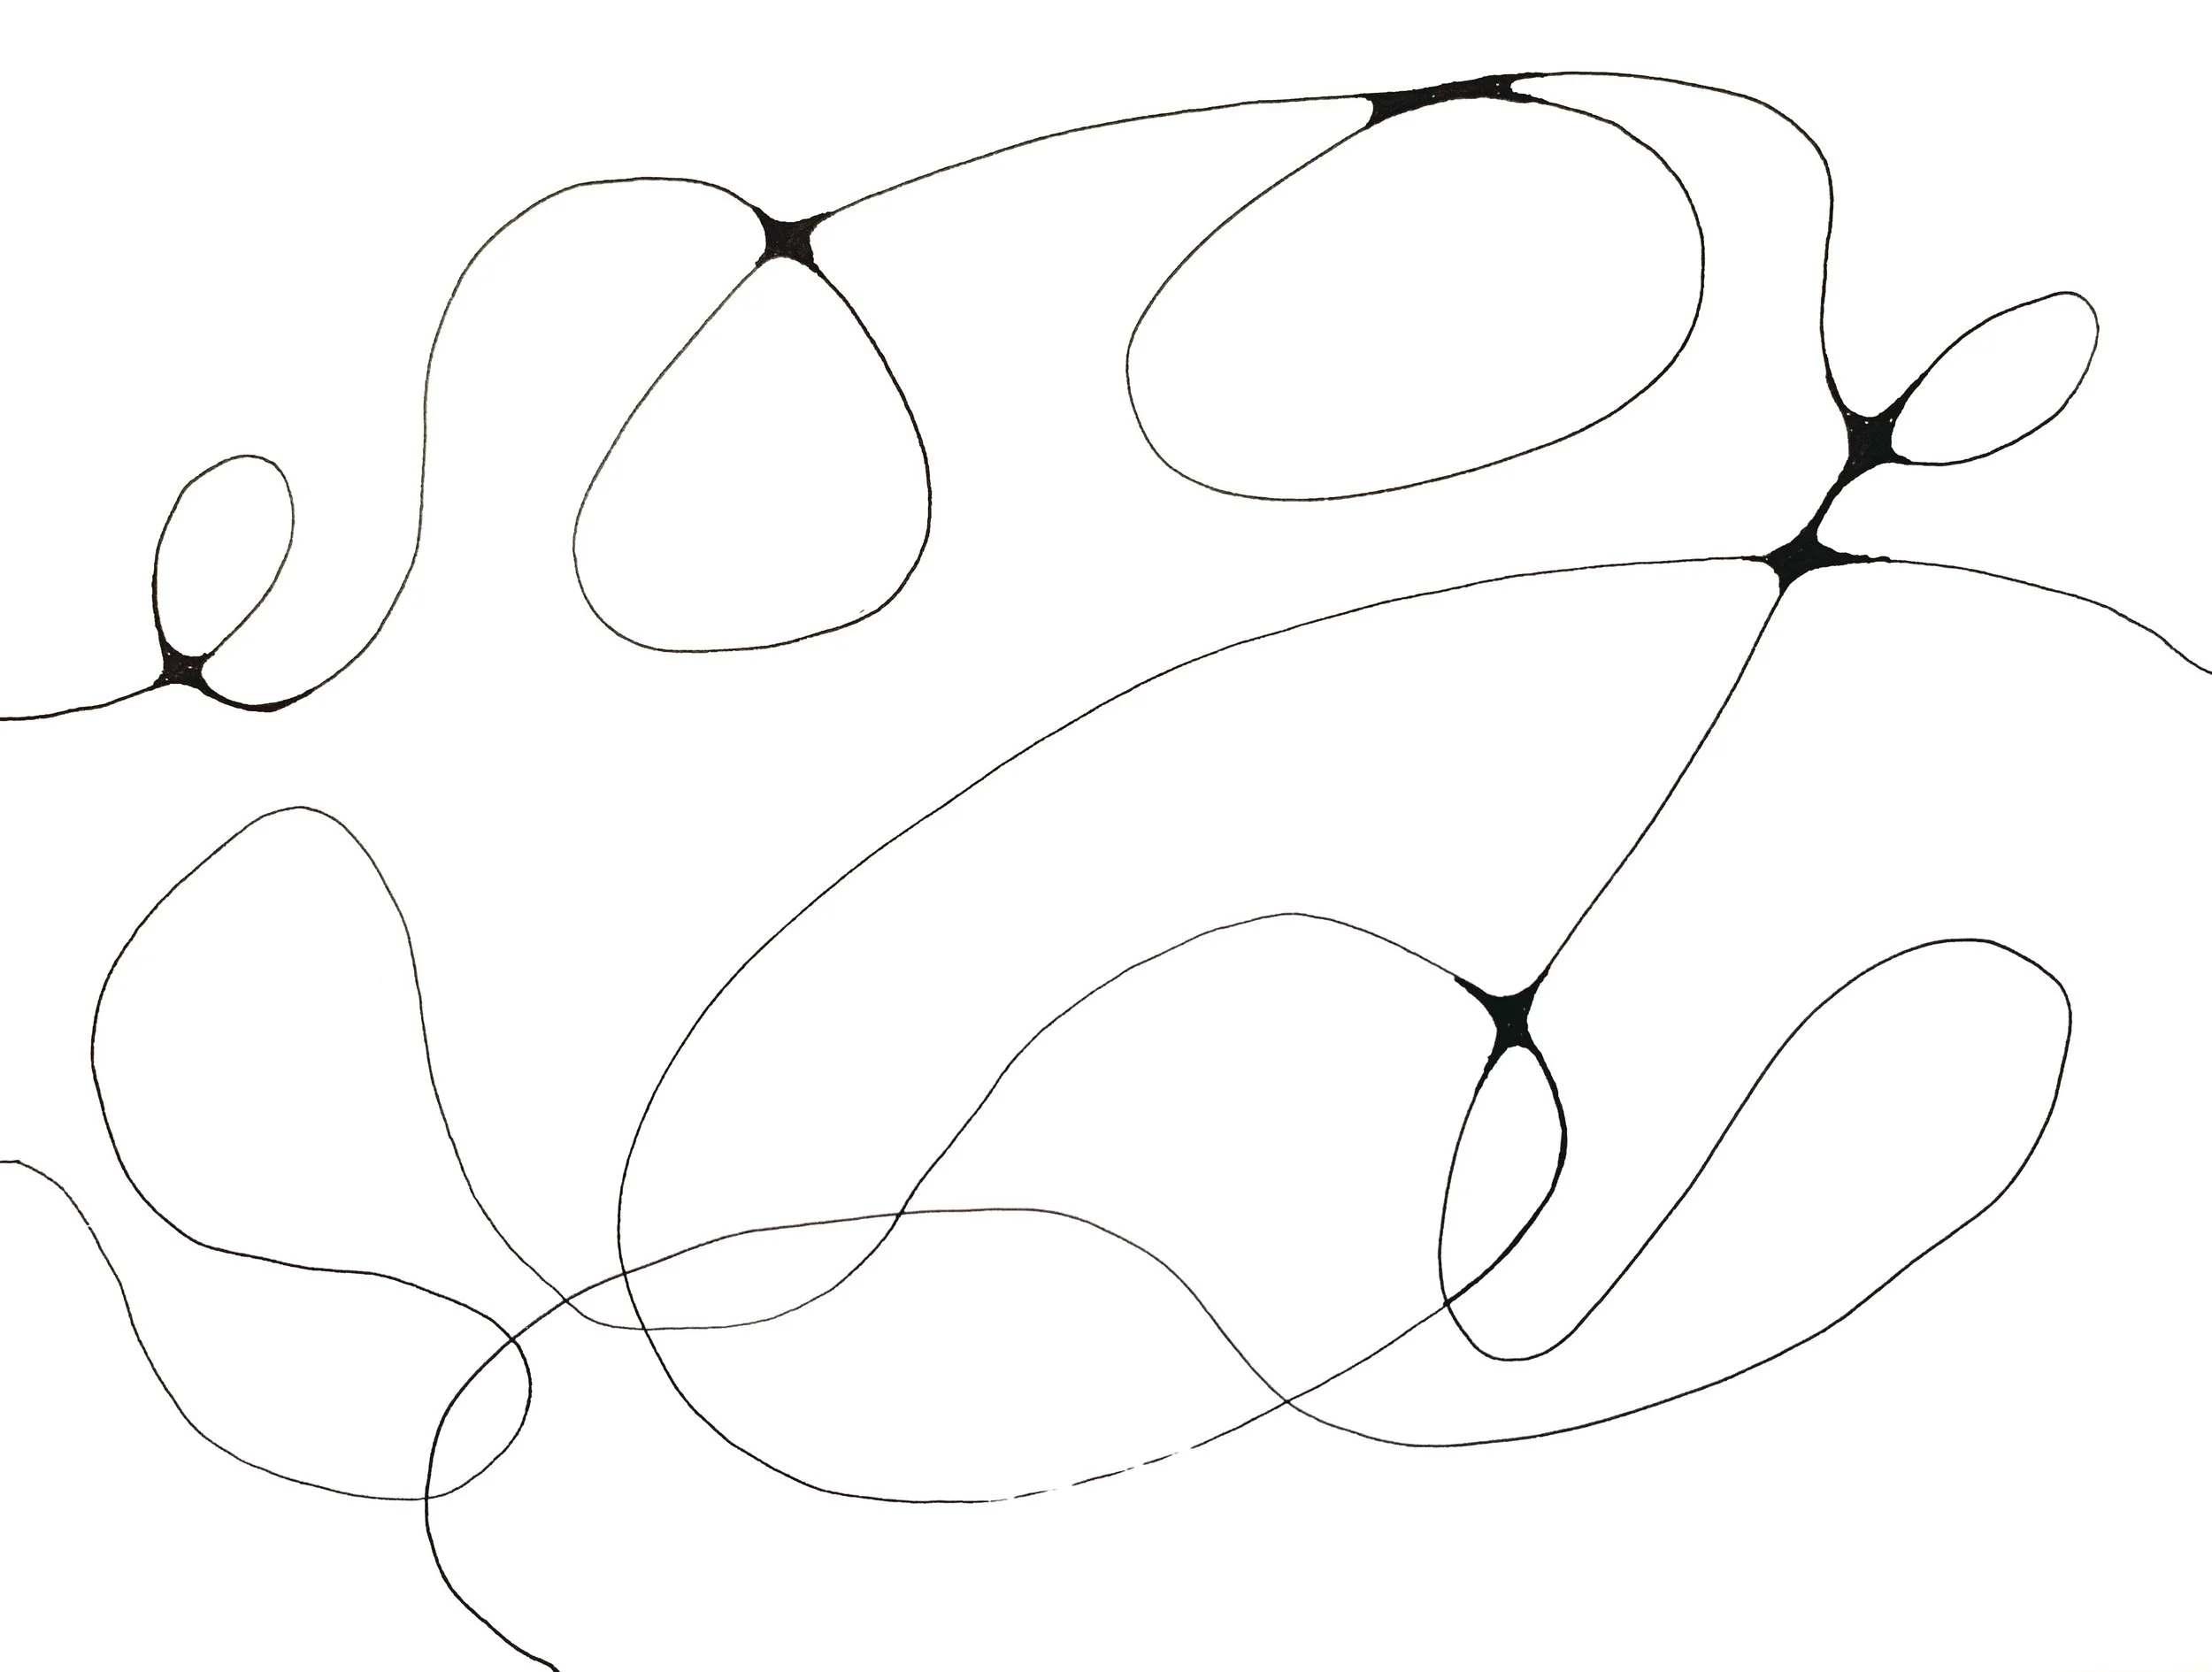
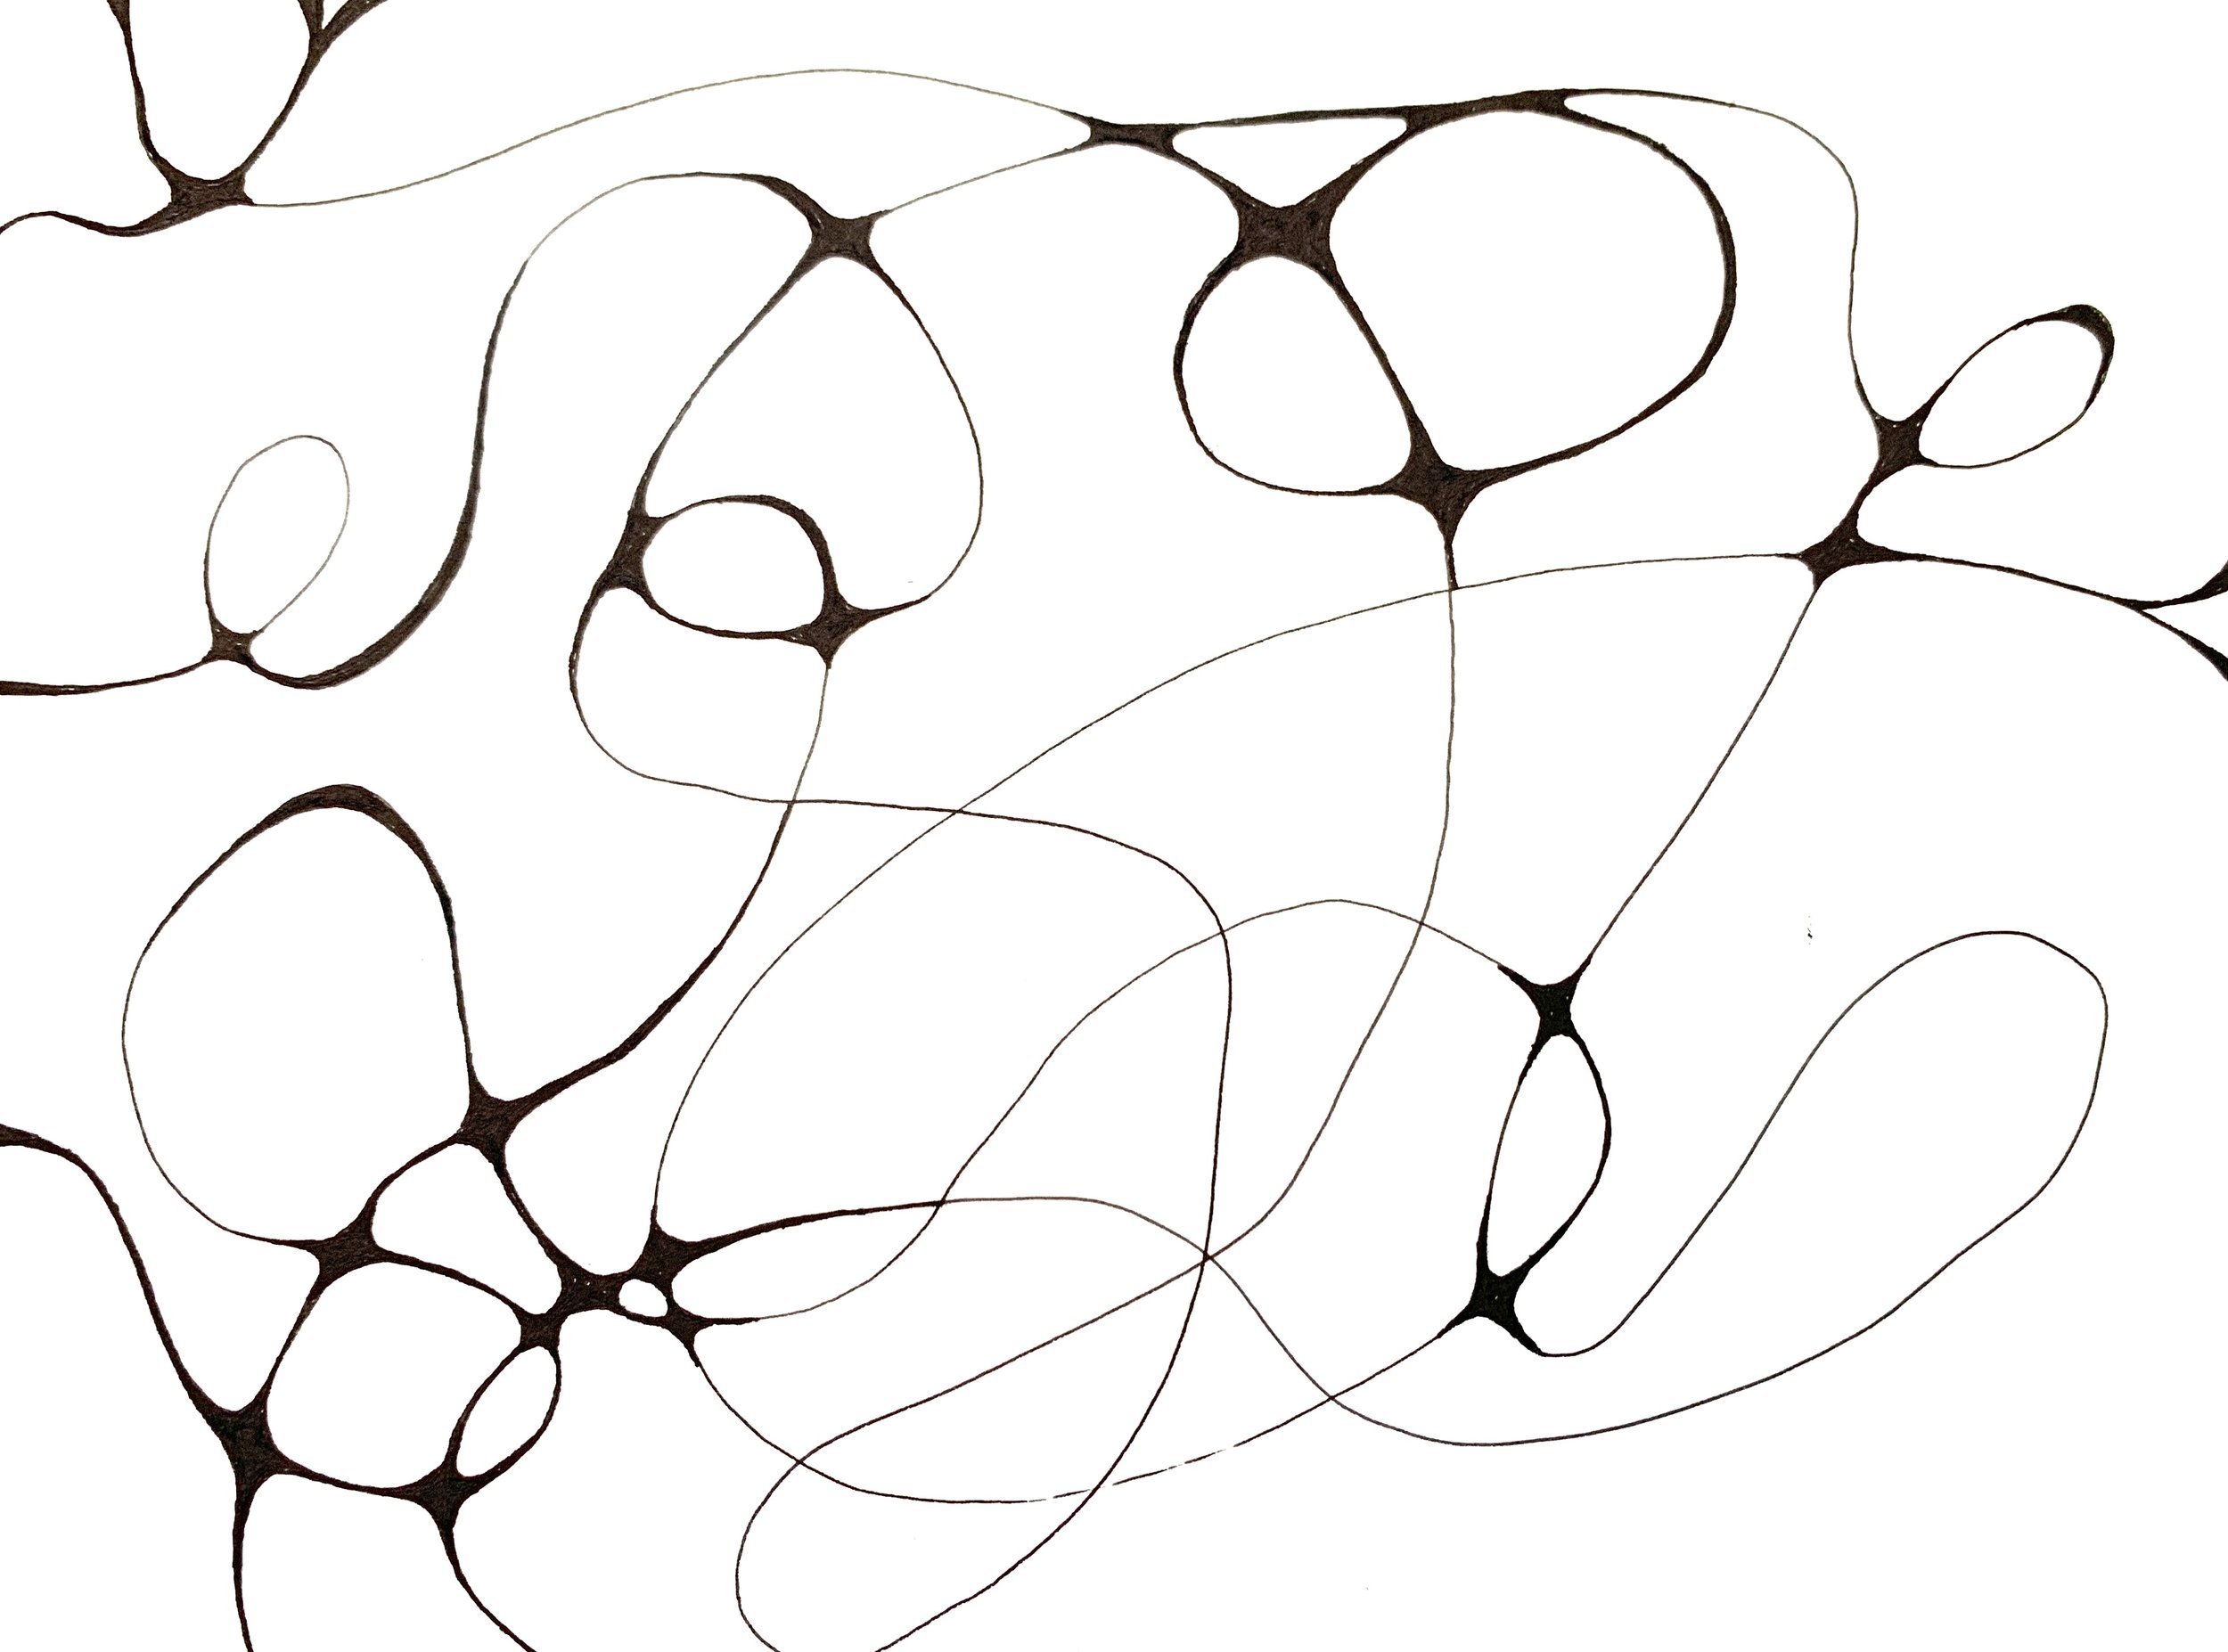
Here’s where the neuron connection begins. Anywhere the lines cross, thicken up the intersection with a curved line and color it in. Let your mind wander at this point.
Step Four:
I found that I needed to add another line. I wasn’t sure why, I just wanted to keep going after I finished filling in all the intersections. Feel free to add spirals, dots, whatever comes to mind.
Step Five:
I like to keep my lines smooth as I do this drawing. That leads me to darken some lines or “synapses” between my neurons. I think of this as widening a pathway and think again about my word.

Step Six:
Finish off your ink drawing with any additional lines you think are necessary. There’s no reason why you feel this way, just let it happen and respond. Then think about your word again…has anything changed for you between now and when you started the drawing? Write about that in your How to create…section of your book.
Step Seven:
I like to keep my images in black and white and pretty basic. Usually after I’m done I have a lot to journal about. But others add color and make really beautiful work from these. I found this on the Art in Basic blog.
Buy my Creativity Journal on Amazon and fill your book with all ten projects! There is space for journaling, ideation and to create the final project. The QR code in the book links you to the journal so you can take it with you and be creative anywhere you go. You just need a pen, curiosity and joyful effort!!